Showing posts with label mdf. Show all posts

Wednesday, 25 April 2018

Why I Love My Tim Holtz Stamp Platform Step By Step


So how is everyone doing? 
I know the blog has been quiet recently but that is all due to change as starting next month, I am extremely happy to announce the new Speshink Design Team will be going live with posts coming each Monday to the blog featuring makes using my New stamps available at Chocolate Baroque or through the Shop Tab at the top of my blog.
There will be a post in the next couple of days introducing the new team.
( I am sorry if I have not got round to contacting everyone that applied, I was completely caught off guard and overwhelmed with the response for the team xx )

Ok, so today's post is all about why I love the Tim Holtz Stamp platform from Tonic Studios.( Not just because it works great with my stamps ;) )
I mainly work with acrylic paints and it can be hard at times to use an image that needs to be colored over a painted surface as the paint can/will obscure the stamped details this also holds true for surfaces like design papers, and until the stamp platform arrived it was almost impossible to line up and re stamp an image you have already stamped.
( I hope I am making sense? )
The stamp platform allows you to stamp an image and then have a perfect alignment for re stamping in the same place. This lets you stamp an image, paint in the details without worrying to much about going over the lines and then re stamping the image over the painted version.
Below I have stepped out how I use the Stamp Platform.
The best thing is it even works with substrates like mdf and grey board, you just have to be careful about where you position the substrate, the thicker it is the further away from the hinge you need to work.


Start with your substrate, I have used an Mdf tag that has been covered with a Gel Plate print I made a few weeks ago.


The magnets wont be able to hold the tag down as it is to thick but you can use them as a guide for the bottom and side edges of the tag, Just be careful when you remove the tag as you do not want the magnets to move.
position the un inked stamp face down where you want the image to be stamped.


Close the lid and apply enough pressure to pick the stamp up.  One side of the platform is for foam mounted stamps and the other side is for clear cling stamps.


Ink up the stamp and close the Stamp Platform and apply even and firm pressure to get a nice cleanly stamped image, I have used archival ink
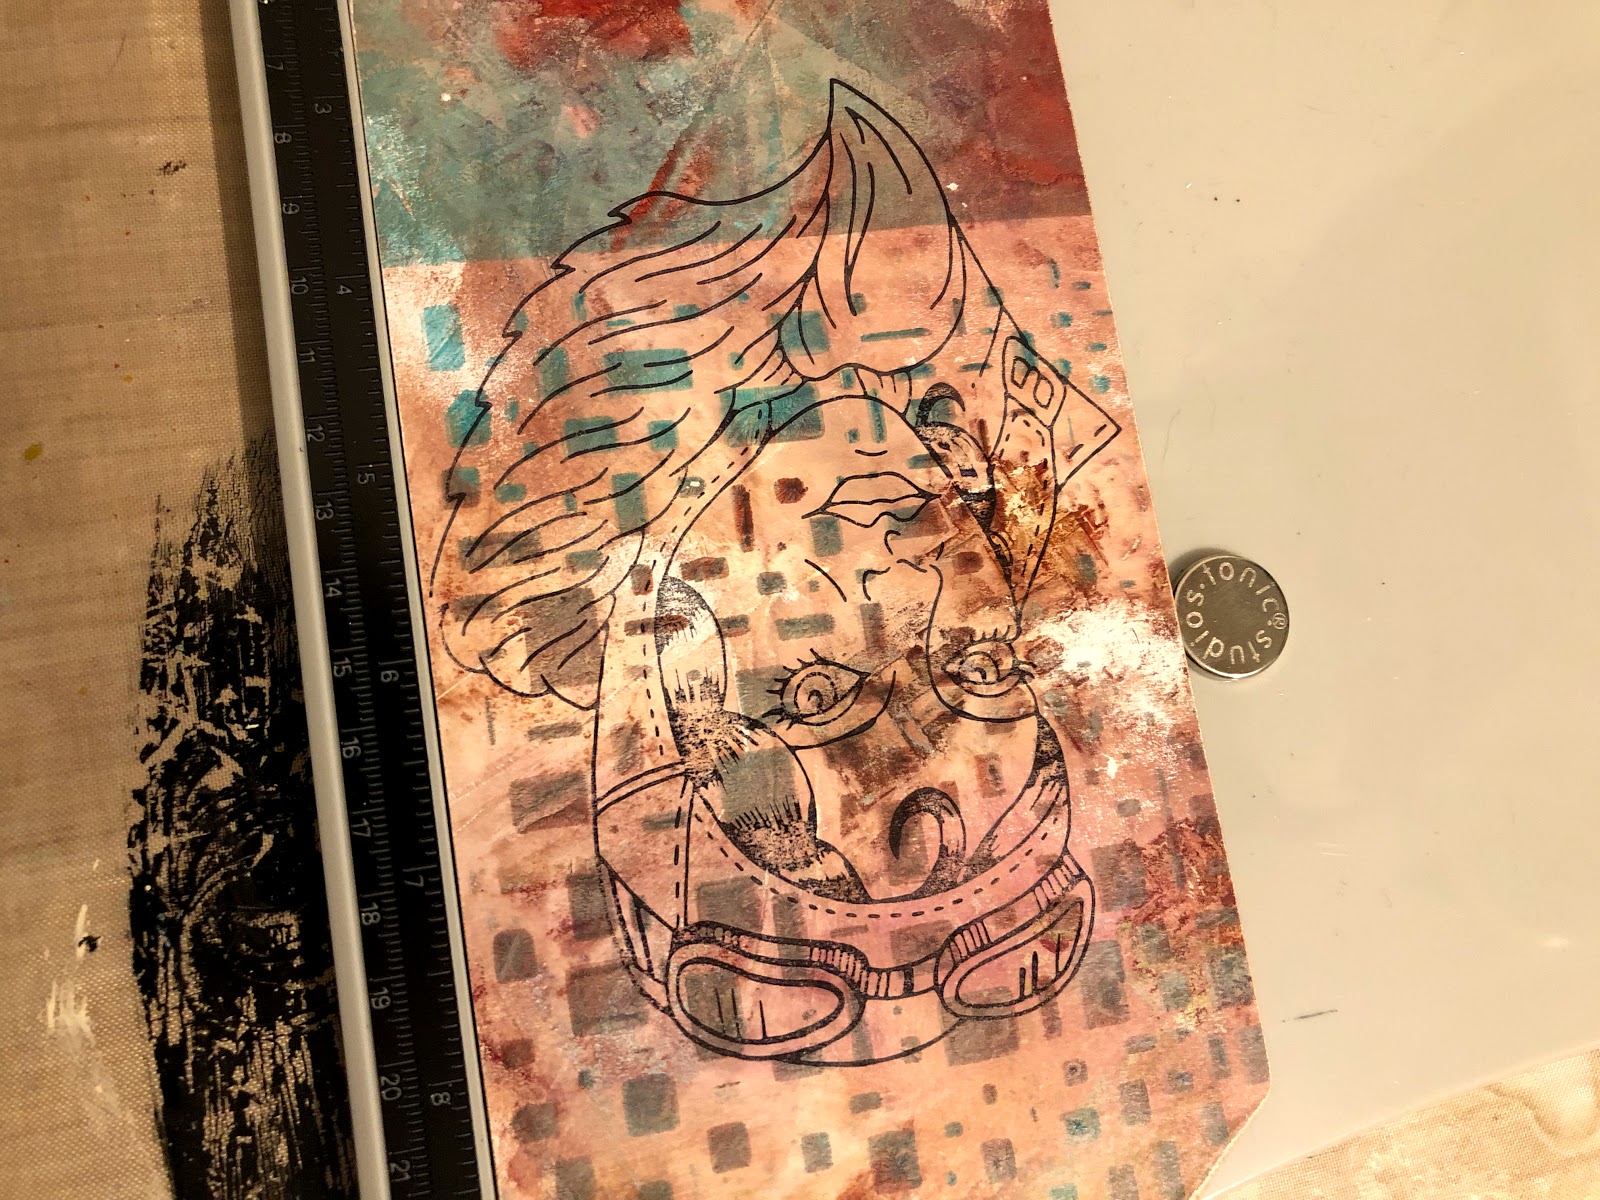

As you can see the image is visible but gets lost with the background details and colors. Don't worry, you only need the lines there to help guide you when you start to add paint to the image.


Now the fun begins ;)
Pic a medium to fine detail brush and start to fill in the design. I have used My Aviator stamp fr this tag.
You don't need to worry to much about painting ontop of the inked lines, just be careful not to go outside the lines. This process is actually easier and quicker than it may look and is quite forgiving once you get to re stamping over the top.
You can see a lot of the inked detail has been lost but its a lot easier to paint straight over the lines rather than going around them.


once the paint is dry, carefully place the tag back on to the Stamp Platform and re ink the stamp.
fold the lid back down and stamp over the painted surface.


Carefully lift the lid up and you will be left with a perfectly lined up and over stamped image.


Now I should have stopped there as I really liked the way the tag was looking but I had to keep on fiddling and I decided to stamp the word Fly to the top, this looked horrible and I had to figure out a way to save the tag.


I ended up using some of the Tim Holtz Printers Blocks to hide my botch. The details have been bought out using Decoart Media fluids to give a distressed look to them, I have also added some of Tim's mini stars that have been aged using Decoart Media Antiquing Cream.


Thanks for stopping by and don't forget to head back in a few days where I can introduce you to the New Speshink DT. I am so excited to share their work with you all. xxx


Thursday, 8 March 2018

Mothers Day Tags


With mothers day in the UK arriving this Sunday I needed to get my craft on and create something for my mum, I am also on double duty as my Sister had a little sprog just over a year ago and till said sprog is able to head to the shops and select a card i have decided to cover all the important occasions for her.
I used an MDF tag from That Craft Place and picked out a design paper for my back ground.
The Tim Holtz stamp platform really comes into its own for me with this technique, and is the reason I picked one up. I was initially skeptical on how the platform would work with a thick substrate, (the mdf is 4mm thick) and i was worried about how accurate the over stamping would be, I needn't have worried, By placing the tag towards the outside edge of the platform I had no trouble getting my image to stamp and it lined up perfectly when I cam back to over stamp.
( I will do a proper little step by step soon )
The Image was stamped using black archival ink and the image was painted using Decoart Media Fluids, you can be quite bold with the paint and it doesn't matter if you paint up to or onto the black ink lines. Once all the painting is done, carefully place the tag back on the stamp platform using the magnets as position guides, re ink the stamp and stamp over the top of the painted image, as the platform is so accurate the lines match up and there is no double image, it really tidies up the painted image and makes using acrylic paints much easier to work with stamped images.


My second tag has been turned into a tag card and I have gone for a more clean and simple look using a faux chalk board finish and this time the Gypsy Rose image has been stamped using a versamark ink pad, some Stamp n Bond from Stampendous (basically a glue that works like an embossing powder) this stuff is great, no more mess with wet glues like the flitter/flutter stuff that is just to sticky and messy. once the stamp n bond has been heated up and turned clear the silver leaf flakes were added for a little bling ;)


Hopefully my Mum ad Sister will like them.

You can find the Gypsy Rose Stamp as well as my other stamps in the Shop section at the top of the page or on the Chocolate Baroque web page under Mark Gould.

Stay Tuned for the new Mark Gould/Speshink DT that will be hitting this blog very soon.


Simon Says Stamps Monday challenge this week is Whatever The Weather and they are asking us to use any Tim Holtz Product, I have used the Tim Holtz Stamp Platform for my Painted Gypsy Rose.


Wednesday, 21 February 2018

Shabby Chic Apothecary Cabinet


To Gunge or not to Grunge.
I have just finished my new workshop sample for a shabby chic 8 inch apothecary cabinet. 
I have taken an Mdf Kit from That Craft Place and using Paints and mediums from Decoart given the kit a grungy shabby chic finish.


The clean shabby chic version.

In the class you will have the option of leaving the kit with a clean shabby chic finish or going all in with the ageing process, we will cover several shabby chic techniques including resist and image transfer using some of Andy Skinner's Vintage Downloads.
We will also be painting mini glass bottles that fit on the inside shelf of the cabinet.
there will be a choice of colours available in the workshop so you can finish the cabinet to your own taste xxx.


I will be teaching this class at the following venues this year. 

17 March      The Forget me Not Craft Cabin in Essex 
24 March       Lets Be Creative in Petersfield near Guildford
16 June          Amelia's Creative Crafts  near Birmingham
23 June          Rowan Tree Crafts    Carnforth 
27 October    The Stamp Addict   San Diego California


Simon Says Stamp are having a Grunge It Up Challenge and I would like to enter, you can find them HERE


Monday, 7 March 2016

Andy Skinner, Decoart/Stampendous Blog hop. Zoltan the Great Tutorial Post


Welcome and thanks for stopping by.
Something a little special going on today, I am teasing you with a little pic of my project for the Decoart Media DT creation for the Stampendous Decoart Blog hop that is going on this week. My tutorial post will go live on Tuesday but today Andy Skinner is kicking things off for Decoart.
All week long members from both Design Teams will be sharing work and tutorial using Andy Skinner's new Stampendous stamps and the Decoart Media line.
All the links can be found at the bottom of the post.


To take part in the blog hop and to stand a chance of winning some awesome goodies all you need to do is visit the blogs each day and leave a comment, each comment on each blog gives you one chance at winning the prizes. The competition IS open Internationally not just the USA and at the end of the week three winners will be picked via a random number generator.

For Decoart.

Monday, Andy Skinner
Tuesday, Mark Gould (me)
Wednesday, Mel Hookham
Thursday, Jools Robertson

For Stampendous.