Showing posts with label decoart media. Show all posts

Monday, 25 June 2018


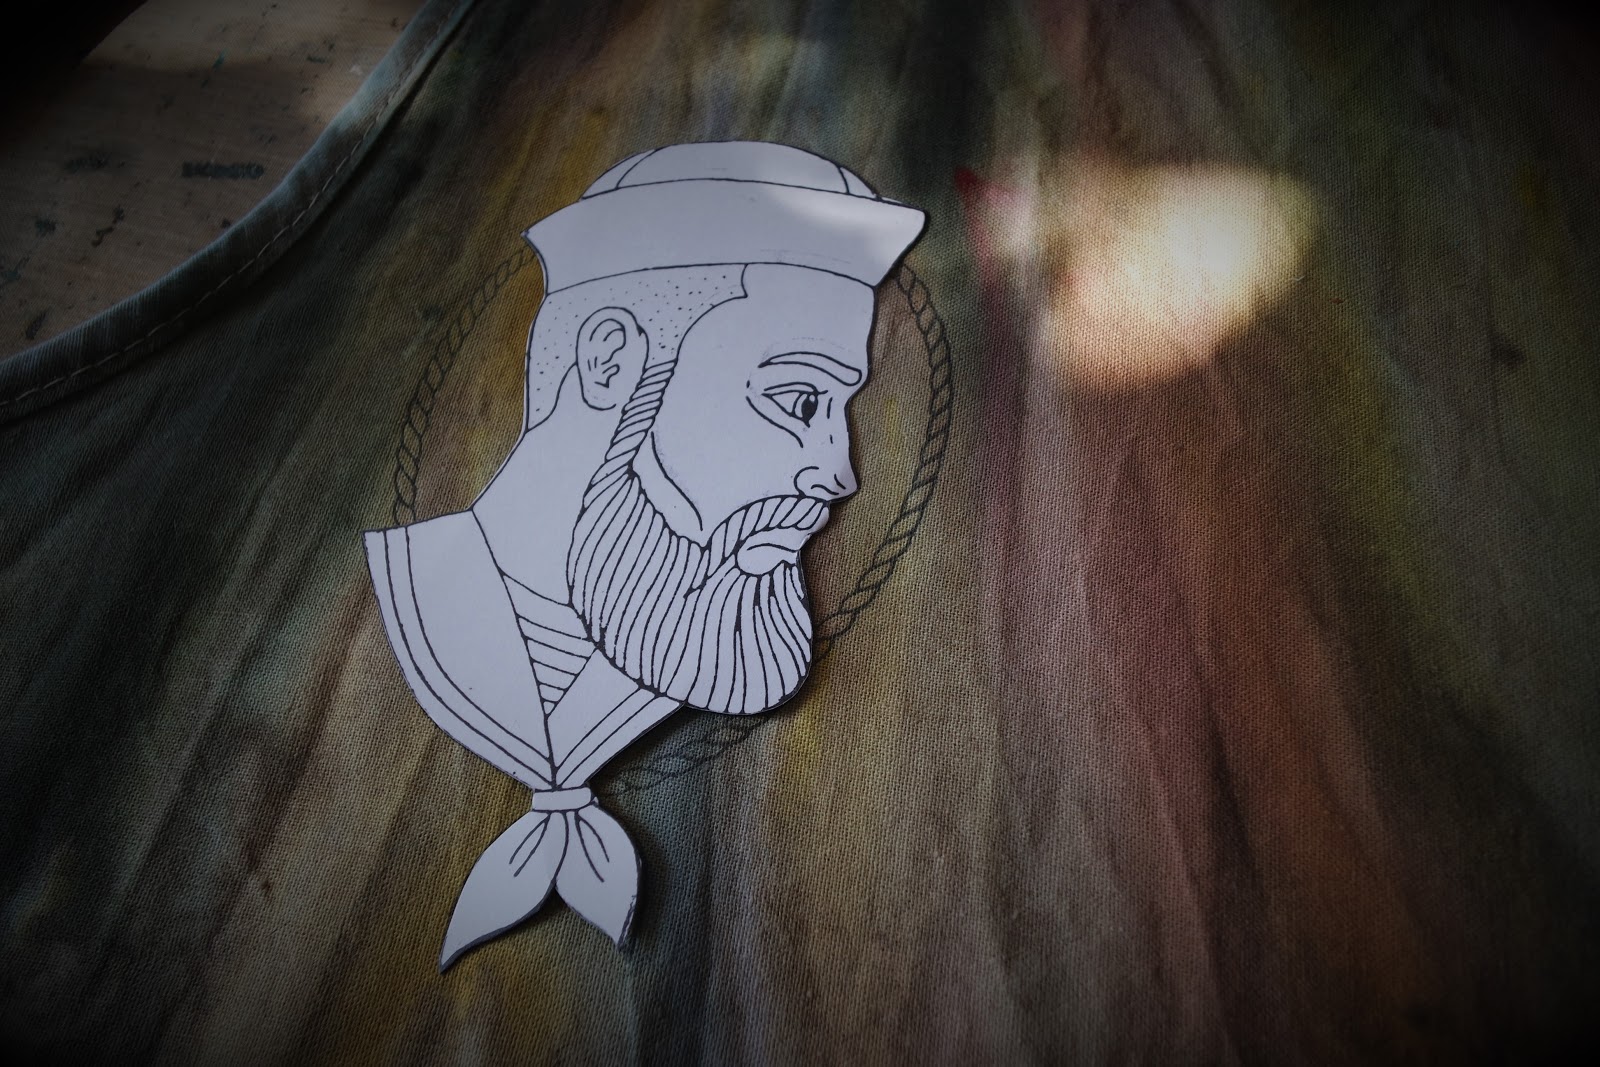
Morning all, and as always a big thanks for stopping by. Today Neil Walker  is sharing a colorful apron he has made using my Sailor Jim stamp, available from my shop at the top of the page or through Chocolate Baroque Here.

Good morning friends.
My turn on the Mark Gould DT this week sees me heading sea side.....
I decided to add some interest to a plain white craft apron that I have had knocking about for a while now, just waiting for inspiration. Which arrived in the form of Mark's Sailor Jim

This was a fun project to do and I took things very casually.
To start I used Infusions to add some colours blends and dried it off.


The focal image was stamped onto the fabric and onto white card (cut out to create a mask)


With the paper mask in place the background was filled in with a random assortment of my stamps from The Artistic Stamper..


Painting on fabric has it's own challenges so I just decided I was not going to get too hung up on staying in the lines.  I used DecoArt Media Fluid Acrylics to paint with. Sailor Jim is the focal point of course so I spent  more time  painting him


Then just some simple highlighting and fun to tie the background together.

I added the sentiment using a Sharpie


I hope you like it. I had a good time making it. Sailor Jim is available HERE


Thank you for stopping by, Head back next Monday to see a new creation from the Speshink DT. xxx


Wednesday, 25 April 2018

Why I Love My Tim Holtz Stamp Platform Step By Step


So how is everyone doing? 
I know the blog has been quiet recently but that is all due to change as starting next month, I am extremely happy to announce the new Speshink Design Team will be going live with posts coming each Monday to the blog featuring makes using my New stamps available at Chocolate Baroque or through the Shop Tab at the top of my blog.
There will be a post in the next couple of days introducing the new team.
( I am sorry if I have not got round to contacting everyone that applied, I was completely caught off guard and overwhelmed with the response for the team xx )

Ok, so today's post is all about why I love the Tim Holtz Stamp platform from Tonic Studios.( Not just because it works great with my stamps ;) )
I mainly work with acrylic paints and it can be hard at times to use an image that needs to be colored over a painted surface as the paint can/will obscure the stamped details this also holds true for surfaces like design papers, and until the stamp platform arrived it was almost impossible to line up and re stamp an image you have already stamped.
( I hope I am making sense? )
The stamp platform allows you to stamp an image and then have a perfect alignment for re stamping in the same place. This lets you stamp an image, paint in the details without worrying to much about going over the lines and then re stamping the image over the painted version.
Below I have stepped out how I use the Stamp Platform.
The best thing is it even works with substrates like mdf and grey board, you just have to be careful about where you position the substrate, the thicker it is the further away from the hinge you need to work.


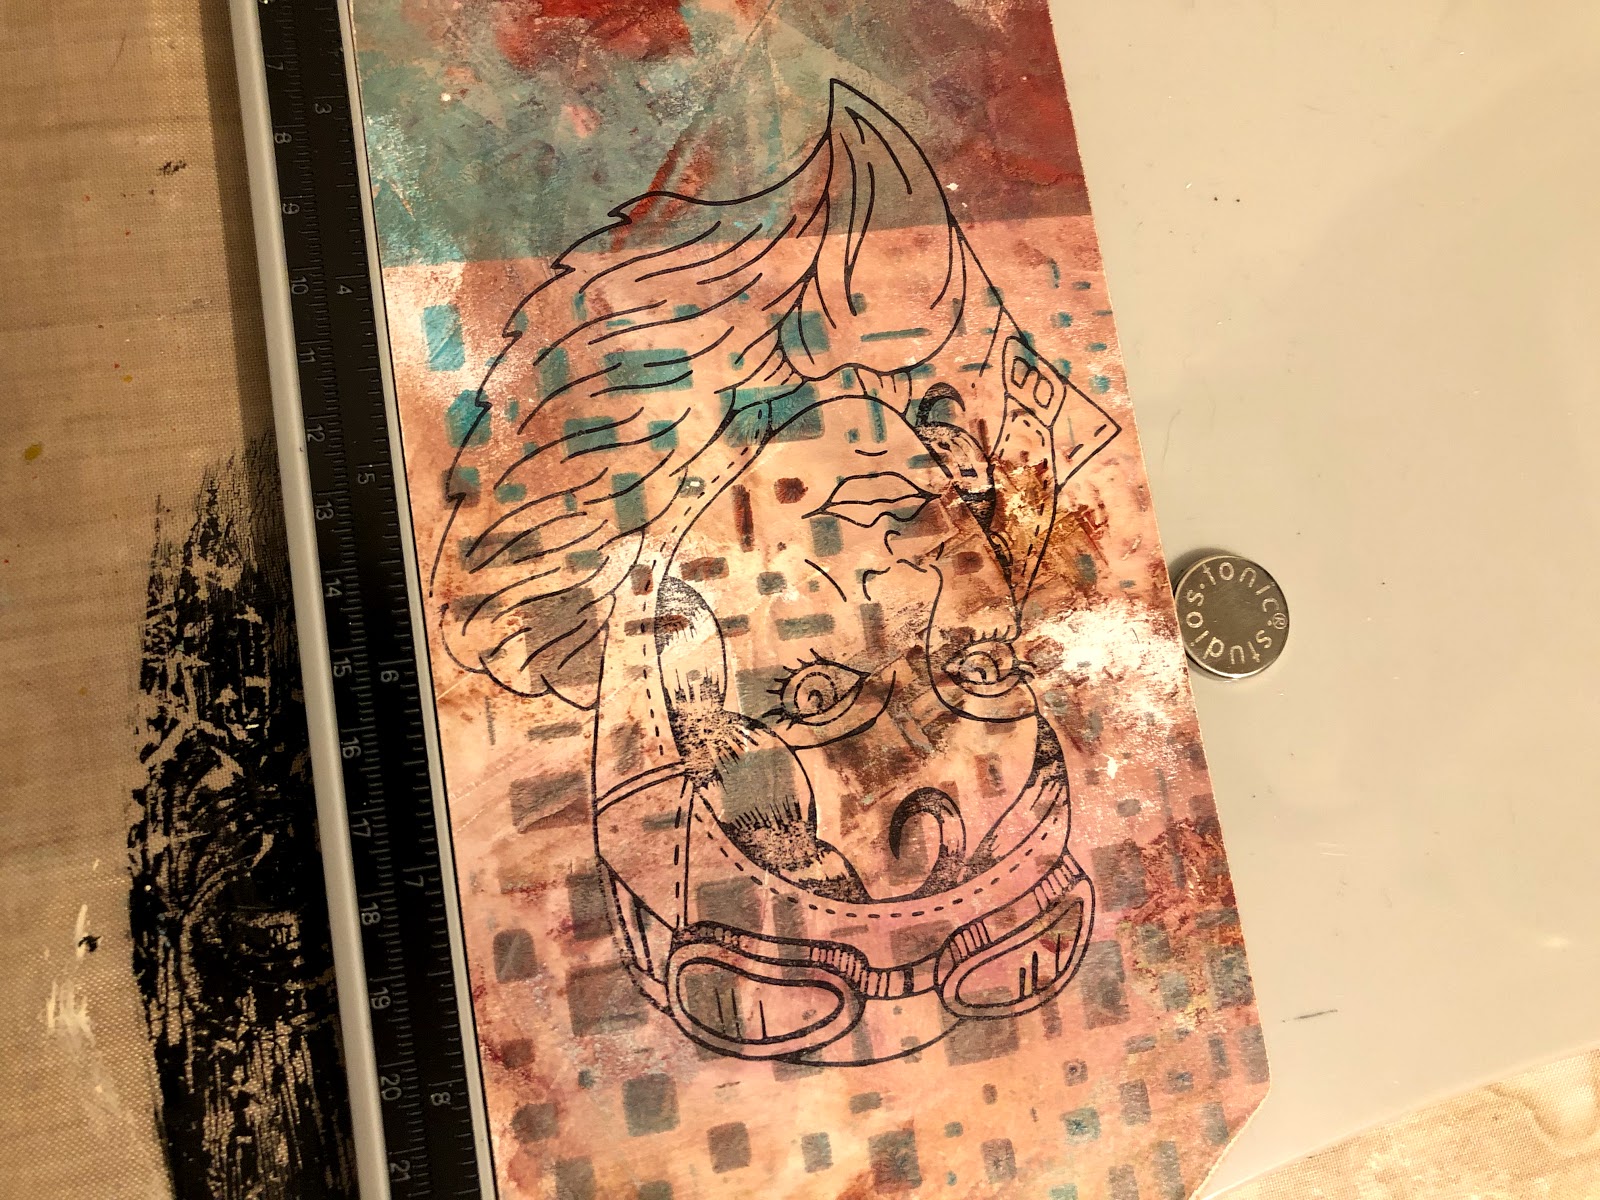
Start with your substrate, I have used an Mdf tag that has been covered with a Gel Plate print I made a few weeks ago.


The magnets wont be able to hold the tag down as it is to thick but you can use them as a guide for the bottom and side edges of the tag, Just be careful when you remove the tag as you do not want the magnets to move.
position the un inked stamp face down where you want the image to be stamped.


Close the lid and apply enough pressure to pick the stamp up.  One side of the platform is for foam mounted stamps and the other side is for clear cling stamps.


Ink up the stamp and close the Stamp Platform and apply even and firm pressure to get a nice cleanly stamped image, I have used archival ink


As you can see the image is visible but gets lost with the background details and colors. Don't worry, you only need the lines there to help guide you when you start to add paint to the image.


Now the fun begins ;)
Pic a medium to fine detail brush and start to fill in the design. I have used My Aviator stamp fr this tag.
You don't need to worry to much about painting ontop of the inked lines, just be careful not to go outside the lines. This process is actually easier and quicker than it may look and is quite forgiving once you get to re stamping over the top.
You can see a lot of the inked detail has been lost but its a lot easier to paint straight over the lines rather than going around them.


once the paint is dry, carefully place the tag back on to the Stamp Platform and re ink the stamp.
fold the lid back down and stamp over the painted surface.


Carefully lift the lid up and you will be left with a perfectly lined up and over stamped image.


Now I should have stopped there as I really liked the way the tag was looking but I had to keep on fiddling and I decided to stamp the word Fly to the top, this looked horrible and I had to figure out a way to save the tag.


I ended up using some of the Tim Holtz Printers Blocks to hide my botch. The details have been bought out using Decoart Media fluids to give a distressed look to them, I have also added some of Tim's mini stars that have been aged using Decoart Media Antiquing Cream.


Thanks for stopping by and don't forget to head back in a few days where I can introduce you to the New Speshink DT. I am so excited to share their work with you all. xxx


Wednesday, 21 February 2018

Shabby Chic Apothecary Cabinet


To Gunge or not to Grunge.
I have just finished my new workshop sample for a shabby chic 8 inch apothecary cabinet. 
I have taken an Mdf Kit from That Craft Place and using Paints and mediums from Decoart given the kit a grungy shabby chic finish.


The clean shabby chic version.

In the class you will have the option of leaving the kit with a clean shabby chic finish or going all in with the ageing process, we will cover several shabby chic techniques including resist and image transfer using some of Andy Skinner's Vintage Downloads.
We will also be painting mini glass bottles that fit on the inside shelf of the cabinet.
there will be a choice of colours available in the workshop so you can finish the cabinet to your own taste xxx.


I will be teaching this class at the following venues this year. 

17 March      The Forget me Not Craft Cabin in Essex 
24 March       Lets Be Creative in Petersfield near Guildford
16 June          Amelia's Creative Crafts  near Birmingham
23 June          Rowan Tree Crafts    Carnforth 
27 October    The Stamp Addict   San Diego California


Simon Says Stamp are having a Grunge It Up Challenge and I would like to enter, you can find them HERE


Wednesday, 8 November 2017

ATC Background Tutorial post


Afternoon all, today I am sharing a simple background tutorial on the Andy Skinner blog, Head on over and you can see how I made the back grounds for these Atc's and I have used lots of Andy's Stampendous stamps and the Decoart Media Fluids with Atc blanks from That Craft Place.

The Atc's below use the background technique but stamps from Tim Holtz and Carabelle Studio.


Friday, 20 October 2017

My Very Own Stamps - Chocolate Baroque


Welcome x.
It's a very happy day today for me as I am extremely happy to announce I have my very first set of stamps released today with the fantastic Chocolate Baroque. 
I can not thank Chocolate Baroque enough for the opportunity to design some stamps with them and I am over the moon with how they have turned out. The stamp quality is amazing and I love the size (A6).

I have had the idea of what I have wanted in a stamp design for some time and I have been heavily influenced by the tattoo, comic book and Steampunk style of art that I love.
It took me a while but I managed to find a local tattoo artist (Lance Steele) that I could work with to make my ideas a reality. He managed to take my ideas and reference material and come up just what I wanted and I hope you all like ;)
The vintage look to the Neo Traditional style of tattoo is what inspired this release of stamps. I like to work with one focal point image when getting crafty with the back grounds being more layered and aged effects so the focal point doesn't get to cluttered and faces work really well for this.
Links for each stamp can be found below xx.


She has been stamped onto a large Acylic tag and painted with Decoart Media Fluids. The background was made using papers from the Authentique Hero's range. The gaps were painted using blue and silver to make it look a little like the sky.


He has been stamped onto some 240gsm card stock and coloured with Copic markers in a sepia tone. He was fussy cut out and glued to a tag that had been covered with design paper from 7Gypsies
The Tim Holtz word tag was added and some Decoart Media antiquing cream was added to bring out the words. This was tied to the tag with some rusty wire which I picked up from my crafty friend Hannah Oxberry who has a lovely online store.
The m Aviator at the top of the page was also done this way.


She was stamped onto an Mdf tag from That Craft Place and I then carfully painted each section careful not to go over the lines.
The back ground was painted using a sun burst stencil and Decoart media fluids, the script was also stenciled over the top. 
Some aging was done using colour washes and the circles were stamped with paint using an old bottle cap.
She was finished off with a coat of Satin varnish.


I used an off cut of wood and used the Decoar Acrylic Media Misters to create the cosmic looking background.
The Gent was then stamped over the top and carefully painted over the top.
Once dry a shabby checker stencil was used to create a little more background interest.
The edges were distressed with black archival ink and the whole piece was given a Satin Varnish.


This tag was covered with some paper from 7Gypsies and as above the image was carefully stamped and painted on top. The wreath was coloured with copics to give a more translucent look and the Tim Holtz stars were added.

Thank you so much for stopping by, it's a;ways very much appreciated.xx
I hope you like the stamps and I am looking forward to seeing what will be created with them xx.


Tuesday, 22 August 2017

Decoart Tutorial. Baroque Gothic Wall Hanging


Morning all, Today I am sharing a little step by step on the Decoart Media Blog where I have created a gothic baroque style wall hanging creating texture with Modeling paste and crackle glaze.
If you have time it would be lovely to see you over there xx. 

Friday, 9 June 2017

7 Gypsies Guest Designer


I am over the moon about today's little post, I have been asked to be a guest designer for the
  7 Gypsies  blog this month.
I was asked to play with the brilliant new Architextures range and have created a couple of vintage and shabby wall hangings.
If you head over to the 7 Gypsies blog you can find more pics and a little write up of how and what I did. 
Hope to see you over there x

Monday, 15 May 2017

Andy Skinner Design Team Grungy Chic Wine Crate


A little tease piece today as I share my first make as part of the New Andy Skinner Design Team.
We will be focussing on Andy's range of products, Stamps, Stencils etc as well as the Decoart range of paints and mediums.
To see the full project with a little info on what I did to achieve the grungy finish just follow the link HERE.
Keep heading back as well so you can see all the new inspiration from the new DT.
xxx.


Tuesday, 11 April 2017

Decoart Graffiti Tutorial Happy Easter


Morning all, thanks for stopping by, It's been a busy few weeks here and I am just back from Andy Skinner's Ministry Of Mixology retreat where Kate Crane and France Papillon taught a weekend of fantastic classes and I was there to lend a hand and teach one o the make and takes on the Saturday eve.
Such a fun weekend catching up with so many crafty friends and so much creativity under one roof always leads to a good weekend away.

Today though I am sharing a Graffiti style step by step tutorial on the Decoart Media Blog, I have used lots of Decoart Media products and the new Chalky Finish White Cream Wax along with various stencils. The main focus stencils are from a new Stencil book I picked up recently after seeing a FaceBook friend post about it, Details can be found on the Decoart post.
I hope to see some of you over there. For those of you that don't know about the media blog, you will be introduced to some amazing mixed media artists sharing their tutorial posts using the Decoart Products.


As always a huge thank you for stopping by.
xxx.
If you would like to follow me on FaceBook you can find me HERE.

Simon Says Stamp Monday challenge are having a Hip Hop challenge ;) x Now I know my entry is a little tongue in cheek but I have tried to keep it festive with my Jesus Graffiti and the links between hip hop culture and the Graffiti street scene lol x.


Friday, 17 March 2017

Decoart / Stampendous Blog Hop Skull Coaster


Items Used:
Decoart Media Fluids
Andy Skinner Stampendous stamps: Skuldoggery, Toxic

Thanks for stopping by on the last day of the Stampendous/Decoart blog hop that has been running all week.
Here are the list of people playing along today. 

Friday

Pam Bray

Jamie Martin

Louise Healy

Asia King

Janelle Stollfus

Lea Fritts

Alison Heikkila

Katy Leitch

Mark Gould

DecoArt Blog


Today I have a 4x4 inch canvas board coaster painted with Decoart Media Fluids and one of Andy Skinners new Stamps from Stampendous.

I started by mixing a pale shade of green using the Media Fluids  and the Media Tinting Base and applied a base coat to the canvas board.
Once dry I stamped the skull with Black Stazon ink and started painting the skull using the fluids acrylics. I watered down the Transparent Yellow Oxide for the main skull, A little Titanium white for the teeth and a little Pyrrole Red for the nose.
I created a mask for the skull by stamping the image on some thin copy paper and cutting it out. I used Andy's Scratch stamp from the toxic set and stamped using the fluid acrylics to add some colour contrast and interest to the back ground.
I finished by stamping the word Fear also from the Skuldoggery set across the top of the skull and using a Posca pen added some highlights to the letters.
The edges were distressed using some Stazon ink applied with some foam.

Thanks as always and If you have some time we would love to see you joining in on the hop and seeing what the other DT members have created.
xx

Wednesday, 15 March 2017

Industrial Grunge Clock Decoart/Stampendous Blog Hop


Items Used:
Andy Skinner Stampendous Stamps. Curiosity, Steampunk
Stampendous Stamp Vintage Note

This week Stampendous and Decoart have come together for a week long blog hop celebrating the Andy Skinner stamps new and old and the Decoart Media Line.
Here is a list of the people participating today.

Stampendous Blog

Jamie Martin

Louise Healy

Mark Gould

Ursula Wollenberg

DecoArt Blog

I am lucky enough to be on both design teams and have taken this opportunity to share a new class I have put together with a new faux Pitted Tin technique and a little rust thrown in as well.


A couple of close up pics to show the textures created.
This is a grey board kit from Tando-Creative and measures 12 inches x

I cant wait to teach this class and I am so excited that the first place I will be teaching it is on my return trip to California this May 5th/6th when I visit It's All About The Scrapbook in Dixon CA.

If you have some time it would be great to see you stopping by the the other hoppers pages and leaving some love, you never know, you might be selected as one of the winners.
Head over to the Stampendous or Decoart blog for details of the generous prize pack. xx