Tuesday, 12 November 2013

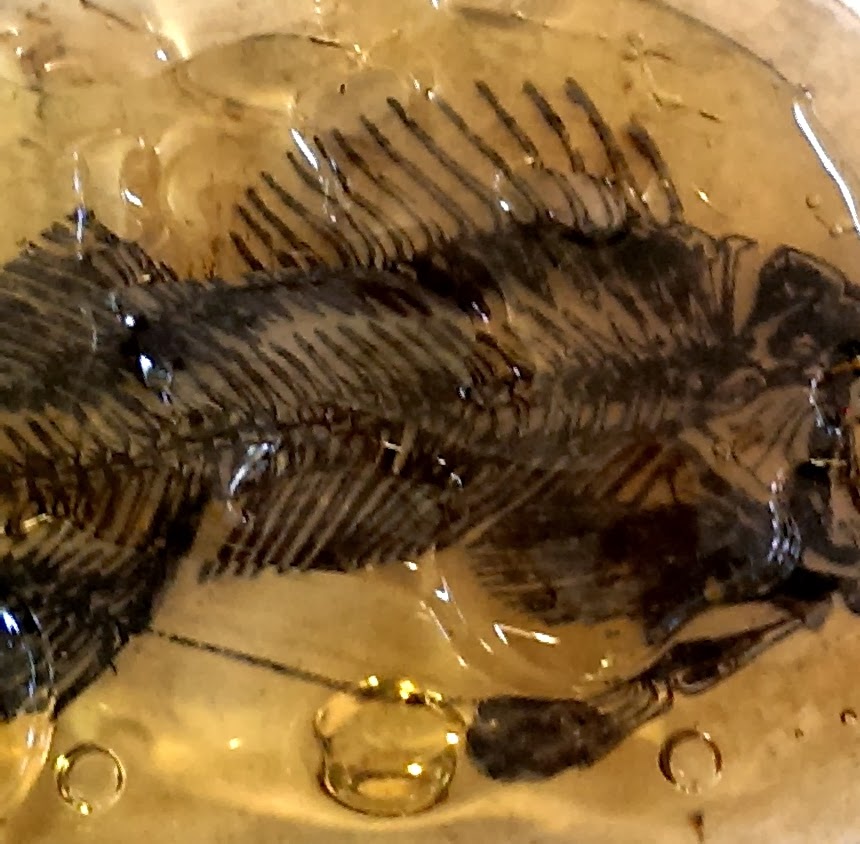
De Stempelwinkel - Amber fragments from the Melt Pot?


Morning all, Thank you all for stopping by.Here is a sneak peek of what I am sharing over at the De Stempelwinkel blog.
There is even a deliberate mistake in today's post ;)  ok, not deliberate, a blond moment lol.
If you have time it would be great to have you stop by xx


Saturday, 9 November 2013

The Octopode Factory - Spots n Stripes


Ok it's official I have a new fave image from Lily over at The Octopode Factory Shop she has just released 2 new images from Beetlejuice. A classic film from my childhood and probably my first brush with Tim Burton.
The Beetlejuice image for me was perfect for our latest challenge that starts today over at The Octopode Challenge Blog, the theme this fortnight is Spots n Stripes.
I started with a tag cut from some black mount board and masked of some stripes with tape. I painted the rest white with Acrylic paint from Decoart. I used the Dyan Reaveley spots stamp and stamped with Pink acrylic paint randomly over the top.When all was dry I peeled the tape away and was left with my stripes. It was looking a little stark so I used the duller green Dylusion Spray and then wiped it back so it more stained the paint than anything else, I coloured my ribbon at the same time. I also added the words, Say My Name. If you have not seen the film, you need to say Beetlejuice 3 times to summon him ;)
Beetlejuice was printed onto some 300msg card and coloured with my Copics, He was fussy cut and glued to the tag and the whole thing was given a coat of Decoart's Triple Thick Gloss Glaze.To finish off I added the brad to the bottom corner.
We would all love to see you joining in our challenge, your crafty make does not need to be spooky, just as long as it fits the Spots n Stripes theme. You don't even have to use an Octopode Image, although we love it when you do and your name goes into the prize pot twice x.
As always thanks for stopping by, I'm sorry for the number of posts this week, just the way it goes sometimes ;)  However I really do appreciate you taking the time to stop on by xxx

I would like to enter this into the challenge over at Punkyou Girl, they are having an 'Angels and Demons' challenge.


Thursday, 7 November 2013

De Stempelwinkel - Pen Pot


Morning all, remember what I said about buses yesterday?
Today I am sharing over at De Stempelwinkel, and this is a little teaser from a pen pot I altered.
If you have time it would be great if you stopped by.
Thank you all so much for visiting, Ill be back on Friday xx


Wednesday, 6 November 2013

The Octopode Factory - Movember Awareness and Fun With ATC's 100


Well it's a busy week here this week, It's just like waiting for a bus, nothing for a week and then they all start turning up at once, so today I am sharing two posts at the same time. The Fun With ATC's post will be below.
As I am sure you have noticed we are now in November a month which has now been claimed by Man and re named Movember to help raise awareness for men's health issues.
Lily over at the Octopode Factory is offering up a selection of her Furry faced images at a reduced rate, head on over to check out what the DT have created. we will also be back latter in the monthi with some more Movember makes.


Ill be back on Friday with more Octopode goodness as we will be starting our next challenge. I know some of you will just love the new images from Lily.
I may even post a pic at the end of the month showing how my Tash has taken shape ;)


Ok, so now on to post number two and this is a post with mixed emotions, as you can see our theme over at Fun With ATC's is 100, this is due to the fact that this is our 100th challenge but sadly this will also be our last challenge.
I would like to say a great big thank you to the rest of the DT, the last year has been a blast and I am very happy to have worked with you all, I'm sure you will all be going on to great things. And of course a great big thank you to all the people that have taken part, the responses to the challenges has always been brilliant and I have greatly enjoyed looking at all your creativity over the past year.
For those of you who will really miss making ATC's why not check out Haunted Design House next month, we will be hosting our 2nd annual ATC swap.It would be great to see some of your faces taking part. x

Thank you all for stopping by. Its always brilliant having you here xx


Tuesday, 5 November 2013

De Stempelwinkel - Calendar Note Book


Morning all and thank you so much for stopping by. I would like to say hi to my new followers and a big thanks for deciding to follow me x
It's my turn again to post over at De Stempelwinkel.
I have a book that I made in a class at my local craft shop. I have used Tim Holtz Papers. To see inside I would love for you to stop by the De Stempelwinkel Blog. xx
Hope you are all keeping well xx

Monday, 4 November 2013

Haunted Design House - Samhain Sunset (Autumn Colours)


Evening all, I hope your all keeping well? 
I know Halloween is over but the minions over at Haunted Design House celebrate it all year round.
We are half way through our latest challenge before our little break.
The theme this time is Samhain Sunset, for people like me, that means Autumn Coulours, with of course our Dark/Gothic/Creepy twists.
We are sponsored this time by the very talented Mitzi Sato-wuiff of Aurora Wings and she is offering up $15 of Digi images for our greusome twosome.
I have used the Las Calaveras image, I love the day of the dead images so this was a no brainer.
I decided to alter a book end i had laying around, this was just a cheap plain wooden bookend I picked up in the craft store.
There is a little teaser for tomorrows make ;)


I printed my image out onto some 300 gsm and coloured the image with my copic markers. the image was edged with some black archival ink and glued onto the book emd with Decoart's faux finish medium. The base of the bookend was painted with Decoart's Persimon acrylic paint. I applied some black modelling paste through Andy Skinners Candy Skull Stencil. When everything was dry I edged the bookend with black paint and covered both images with Decoart's Triple Thick Gloss Glaze.


Thank you so much for stopping by. x If you have time we would love to see your creepy creations over at Haunted Design House 
And it's always worth checking out what the other minions have been creating xx

 I would like to enter this into the challenge over at Punkyou Girl, they are having an Angels and Demons theme.


Saturday, 26 October 2013

The Octopode Factory - Pumpkins


Well over here in the UK the Summer seems like a distant memory and winter is very much round the corner so making the most of the Autumn and the Halloween season is a must for me.
With that in mind the new challenge over at The Octopode Factory is 'Pumpkins'.
I have used another of the Tando-Creative Mixed Media Boards I am loving these they take paint and pretty much anything you can throw at them.
I thought Lily's Edward Scissor Hands image would add some humour and who else could carve a pumpkin as well as Edward?
I have also used the Set Of 3 Pumlkins, the images have all been coloured with Copics and clear embossed.
The back ground was painted with Decoart Americana Acrylic paints,I started with a citrus Green/Yellow, a layer of Decoart's Weathers Wood, this gives the really great cracks when another colour of paint is applied over the top, I went for a pumpkin orange.
I mixed some green acrylic paint with Decoart's Modelling paste and applied it through a shabby diamond stencil. When this was dry I swiped the edges with some archival ink and gave the whole thing a generous coating of Decoart's Triple Thick Gloss Glaze.
I added the chunky eyelet, the pumpkin brad and a suede thong to finish off.

We would love to see you join us over at The Octopode Factory for the challenge.You have just under two weeks to take part. As always there are some images up for grabs for the winner, you do not have to use an Octopode Image but if you do your name will go into the prize draw twice xx
Thanks for stopping by xx


Friday, 25 October 2013

De Stempelwinkel - Pop Artish Halloween


Morning all and thanks for stopping by. It's my turn once again over at De Stempelwinell to share a project.
We are on a month long Halloween trip and I have tried something a bit different by making a pop artish canvas.
If you have time it would be great if  stopped by.
xxx

Tuesday, 22 October 2013

Fun With ATC's - The Night


So how is everyone doing?
Thanks for stopping by, today I am sharing an Atc I have made for our latest challenge over at Fun With ATC's.
Our theme this fortnight is 'The Night' Head on over to see what the rest of the DT have created for the challenge, we would of course love to see what your take on The Night would be.
I got to use my zombie stencil that an American friend sent me a while back, I thought this would be a great challenge to break it out. The back ground has been done using Decoart acrylic paints, several colours semi dry brushed over a white base to get a nice moody look.
I stamped the script with white acrylic paint, the stamp is from The Artistic stamper and I love this hand written look.The stencil was painted with a really dark blue and I added 'The Darkness' using Tim Holtz's litle alphabet stickers.
The whole ATC was given a thin coating of Decoart's Triple Thick Gloss Glaze
Thanks for stopping by.
xx

Over at the Wicked Wednesday ATC Challenge Blog, they are having a Goth Challenge.


Saturday, 19 October 2013

De Stempelwinkel - End Of Days


Morning all. It's my turn again to share over at De Stempelwinkel.
I have a Halloween inspired Mixed Media Board tag.It would be great if you have time to stop on by.
If you do not know who De Stempelwinkel are, they are a Dutch shop that produce lots of their own rubber stamps.There is something for ever taste of stamper.
As always a great big thank you for stopping by, sorry I have not been around to many blogs recently. My laptop time is pretty much long enough to write posts, But I am getting round and seeing lots of amazing pieces via my mobile ;)

xx


Thursday, 17 October 2013

Haunted Design House - Zombies and Creeps


Evening all, I hope you are all keeping well.
Now this post is a little late but I have had no time on my laptop the last few days.
The new challenge over at Haunted Design House is 'Zombies and Creeps'
I know a lot of you have your Halloween heads on so why not come and join in. We are sponsored by 

Betty is offering up some of the Zombies and Creeps images that she has available for our Gruesome Twosome.
My piece did not exactly go as planned. I coloured the zombie pirate image with copics and glued it to the front of a 6 inch fat book.I was unsure what to do around the edge so I thought I would try the Mica fragments I have had for a while.I realised you could still see some of the card showing theough so I gave the whole thing a was with some Quin Gold acrylic paint from Decoart. This did age everything up quite well but one of the ageing stains sadly stayed on the face of the main image.
The whole thing was given a thick coating of Decoart's triple thick glaze. this has helped keep the fragments embeded and helps make all the colours stand out a little more.
One of those pieces that I learnt a lot from so next time I can get a better finish.
Thanks for stopping by x

Sunday, 13 October 2013

The Octopode Factory Challenge, De Stempelwinkel and Tando Mixed Media Boards.

So how is everyone's Sunday going?  it is miserable here, it has been raining pretty much non stop all day.
Ok so on with the post. I am combining a couple of posts today to make life simple and because they have a common element. The Mixed Media Boards.More about them in a mo.
 I am starting of with The Octopode Factory, we have just started our new challenge, the theme this time is 'Witches', we want to see any type of crafty project all you need to do is have a witch in there somewhere.
Lily has several great Witch designs in here Etsy shop HERE. You do not need to use an Octopode image for the challenge but if you do your name will go into the prize draw twice for some of Lily's designs.
 I have used one of Tando's new mixed media boards for the base of my little over sized ATC/Tag.
I printed the Witch from the Gloomsville set along with her cat onto some 300gsm card and coloured her with Copics. I then used some Decoart Faux Faux Finish Medium and painted over my image carefully making sure I covered her and the cat completely.This allowed me to go in and use my Distress inks to add colour to the back ground and stamp the web and Witch Hazel label also using my distress inks.The Faux finish acts as a resist and I was able to just wipe clean the Witch carefully with a baby wipe and some kitchen towl. To finish off I used Decoart's Triple Thick Gloss Glaze, I normally use Embossing powder and add 2 - 3 layers to get a nice smooth finish. With the triple thick its just a case of apply in a layer with a paint brush fairly thickly, it self levels so you don't need to worry to much and you will not be left with any brush marks. just a very rich glossy look to your work. I am loving it, it's like glossy accents just more versatile, better and most of all cheaper whilst still maintaining quality.
Please stop by and if you have time join in the fun. it's worth stopping by to see what the rest of the DT have created.


Now onto the Second Post. It is also my turn over at De Stempelwinkel so here is my little teaser. we are in a Halloween mood this month and I have used my favourite stamp on a painty back ground again using a Mixed Media Board from Tando-Creative


Finally onto these Mixed Media Boards. Tando have just released these and I am loving them. there are two sizes available. These are the 74mm x 138mm chip board boards so bigger than an ATC but smaller then the normal Tag size whist still being big enough to be made into small tags.
I have found these boards to be a great way of trying new techniques out as they will stand up to pretty much anything unlike normal card that warps and wrinkles if you want to use paint.
They can also be embossed.
The first tag I am very pleased to say has been used on the packaging for the packs of boards (well chuffed)
and has been embossed. More on the technique another time. Ill be doing a tutorial soon.


The Second board has been coated with Decoart Gesso and then painted with several washes of colour using the Decoart Traditions acrylic Paints.I used one of Andy Skinners Masks and applied some modelling paste through the stencil.When dry I used the Decoart Metallic Lustres to add some shine. The lustres are a water based rub n buff product. when dry you can get quite a nice shine from them.


Finally I made this tag. I used a couple of embossing folders for the skull and web.Every thing was coated in Gesso and left to dry. I used Voodoo Stencil that comes on the same stencil as the candy skull above and  used the Lustres through the stencil and buffed to get a nice shine.A little was also rubbed onto the lower portion of the tag. A couple of washes of translucent acrylic Traditions paint were applied to add some colour and dried. Using the translucent colours allowed the Lustres to shine through. It has the light effect where it is more visible at certain angles depending on how the light hits it.I also used the Lustres on the web and skull. A little bit of script stamp was added using black archival ink and then the whole piece was coated with the triple thick gloss glaze.


Thanks for stopping by. as always it really does mean a lot to have you drop in. Also a big welcome to the new followers. thanks for taking the time to become a follower and I hope to see you back here in the future xxx

I would like to enter the bottom tag into the challenge over at Our Creative Corner. The theme is a Hallowen Tag with Some Texture.


Thursday, 10 October 2013

T Light Candle Holder Tutorial - Decoart and some exciting news


Thank you for stopping by. 
Today I am sharing a little tutorial on how I made this candle holder.
But first I need to share some news that I have been sitting on for a couple of months. If you have stopped by before you may have noticed I use and love using Decoart products. 
I was lucky enough to have been asked to be part of their New Decoart International Design Team, headed by Andy Skinner, and I am sure at least some of you will recognise the other members of the team.


To say I am happy would be an understatement (doing a little happy dance).
The new DT will be focusing more on mixed media and altered art projects and producing tutorials along the way so keep checking back to see what everyone has been creating.
Ok so stick with me, I'm new to this tutorial thing ;)


Here is a list of the products used with a link to the item on the Decoart site. You should also be able to find a stockist on their main site as well.
The traditions range is an Artist quality pigment acrylic paint.
Archival Black Ink Pad
Some Stencils and some sand paper as well as your wooden candle holder.


I started by giving my candle holder two fairly light coats of Gesso and gave it a light sanding just to smooth it out a little when dry. I also gave the whole thing a coat of the Faux Finish Medium. I did this because it adds an extra layer of protection when sanding back the top coats. I did not want to rub through the Gesso to reveal the wood, I wanted the white of the Gesso to be the last layer seen in the distressing phase.


When the Faux Finish Medium was dry I painted the holder with the Hansa Yellow first, then a coat of the Quinacridone Burnt Orange and finally a coat of the Napthol AS Hue


Now the fun starts, grab some sand paper and start sanding away through the layers, It's best to start gently and go through the layers slowly as you can not undo it if you get a little carried away ;)
Keep going till you are happy with the result. When this is done on a wooden Item like this candle holder you get to see all the wood grain come out as you sand through the layers and get some lovely effects.I also painted the insides where the candles sit with the Carbon Black.


You can of course use any stencils to add decoration but I have always loved the look of random numbers when applied like a an issue number (think old delivery crates/containers)
To get the numbers straight I used some of tape you can use for masking your projects.It will not peel the paint off when it's removed.I lined the stencil up and used a stencil brush to apply the Carbon black paint 


I painted the numbers in the same spot each side as this would make a great centre piece for a table and I did not want to have a front and back. I also used a hexagonal patterned stencil and randomly applied the paint 


When the black paint had dried I very lightly sanded over the numbers and hexagons as they looked to stark and harsh and needed to be given a more shabby look.


It really starts to come together with the finishing touches. I used some cut and dry foam and swiped the edges with black archival ink. I went round all the edges twice building up the depth of the black slowly rather than putting it on to thick and heavy in one go.I let the ink dry and gave the whole piece a coat of the Faux  Finish Medium.
Finally I gave it two coats of the Traditions Satin Varnish giving a very light sanding between coats just to get a really smooth to the touch finish. It also helped really make the colours pop.


The candles did not want to play ball, it was a little breezy out today. 
Here are a couple more pics of the finished piece.


As always a great big thank you for stopping by and if it is your first time here thanks for stopping by. Hopefully Ill see you back here.
Remember to check out our brand new International Decoart Design Team where you can meet the other members and see more tutorials. Keep checking back to see what's new xx


I would like to enter this into the challenge over at Anything But A Card. they are having an Orange And Black theme.


Tuesday, 8 October 2013

Fun With ATC's - 3 Or More Stamps


No inks.

Morning all. I hope you are all well?
Today we are starting our new challenge over at Fun With ATC's
The time round we are asking that you create an ATC using at least 3 stamps.
For my ATC I decided to create mine without using Inks as all but still wanted to get an aged and vintage look, where I would normally reach for my distress inks I decided to use my Decoart acrylic paints.
The back ground was created with colour washes over a cream base.I started by stamping over the whole ATC with a vintage script stamp from Artistic Stamper,
I stamped the Da Vinci image with black paint as well as his name.and then used Quin Burnt Orange to stamp the Fleu De Lis. All these stamps are from the da Vinci set available from de stempelwinkel.
The ATC was sealed using Decoart Faux Finish and used their 2 step crackle applying two coats of step one and when dry applied one coat of step 2.When that dried I rubbed some brown acrylic paint into the cracks.
Thanks for stopping by, it's very much appreciated x
You have two weeks to create an ATC and we would love to see you join us or at least stop by and see what the rest of our DT have created. xxx

I would like to enter this into the challenge over at Anything But A Card, they are having an Orange and Black challenge. x

Saturday, 5 October 2013

Simply Steampunk Challenges - Guest DT - Monochromatic challenge

Welcome back and thank you so much for stopping by.
It's time for my Second Piece as Guest Designer over at Simply Steampunk Challenges they are starting their new challenge and the theme this time round is Monochromatic.
As you can see I went with shades of brown. Largely due to the fact that the Earth colours are the ones I have the most of in my Copic's ;) and of course, Capricorn is an Earth element.

The image is from the insanely talented Abigail Larson  and Betty from Simply B Stamps has the rights to sell these beautiful images as a digi stamp.

I decided to go for a journal page for my Dyan Reaveley journal, I printed out the image and coloured her with lots of different shades of the Earth tones from Copic's, roughly tore her out and added some age using old paper and walnut stain distress inks.I also stamped the word Capricorn and Earth using an alphabet stamp set from De Stempelwinkel and again aged the paper with the same distress inks.
The back ground has all been created with Decoart products.I started by using some white Americana acrylic paint at the bottom, some fawn in the middle and some raw umber at the top and blended them together on the page. I used a Tim Holtz stamp (the text from Papilon) with black archival ink and randomly stamped, I also used a fleur de lis cover the card stamp and stamped with some raw umber paint, I did not use a block for stamping these images as I wanted softer edges and only parts of the designs to show.
 I also used a cogs stencil and applied  Decoart's Metallic Lustre,Iced Espresso using some cut n dry foam,(white side)
I love these lustre's, when they are dry you can buff them with a soft cloth and get a great shine.
 I also used a script stencil and coloured some Dimensional Effects with a little acrylic paint.The text at the top is the colour as it was applied, the bottom set of text has been darkened with some walnut stain distress inks. the Dimensional Effects/modelling paste takes ink really well.
 Before gluing the images down I added some of Tim Holtz's sticky tape, his cogs tape is ideal for steampunk.
 I finally added a little more texture using the edge of a piece of card swiped through some paint and then dabbing it across the page.

 The challenge runs for a month so there is plenty of time to take part and there are prizes for the winner. It would be great to see you over at Simply Steampunk Challenges
 Again, thank you for stopping by xx